Visio 2019 Pro

Installation guide Visio 2021 Professional
1/2/3/4/5 PC - 32 & 64 Bits

  • 1,6 gigahertz (GHz) or faster 32-bit (x86) or 64-bit (x64) processor
  • 2 gigabyte (GB) RAM (32 bit) or 4 GB RAM (64 bit)
  • 4 GB of available hard disk space
  • DirectX 9 graphics device with WDDM 1.0 or higher driver
  • Windows 10 or Windows Server 2019
  • Please note that Visio 2019 Professional is NOT compatible with older Office versions

Remember, the key you have purchased is a prepaid code that is not compatible with the pre-installed software. This is an original Microsoft product.

Uninstall the previous version of Office that you have on your PC and restart your computer. This is important to avoid compatibility problems.

Download the program with the following download link:

LANGUAGE32 AND 64 BITS
DEUTSCHHerunterladen
ENGLISHDownload
FRANÇAISTélécharger
ITALIANOScarica
ESPAÑOLDescarga

This ISO file is the basis for the installation of the product.

Once the download is complete, right click on the downloaded file and choose the “Mount” option from the dropdown menu.


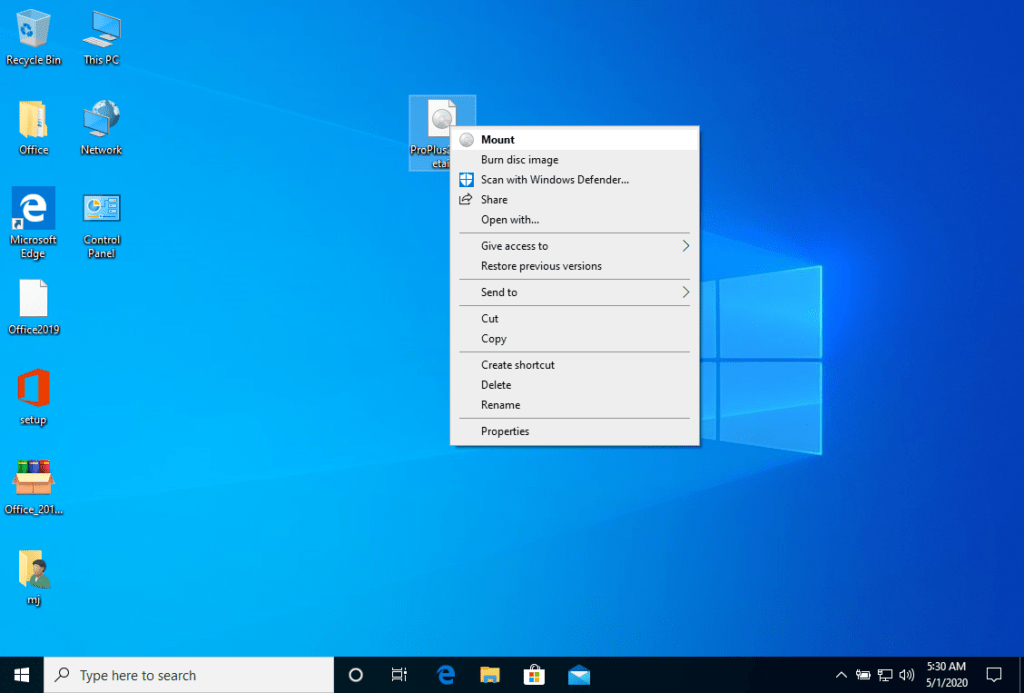
After the ISO file that you downloaded is mounted, you can access it from your Computer as a DVD drive. Here you can run the installer.

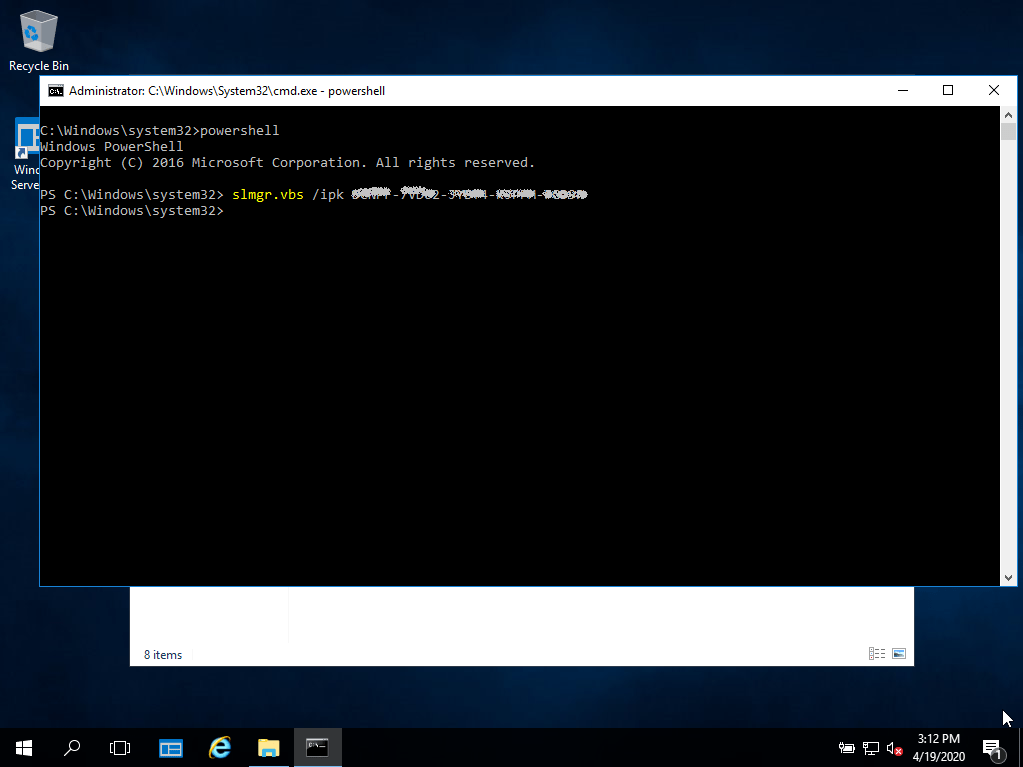
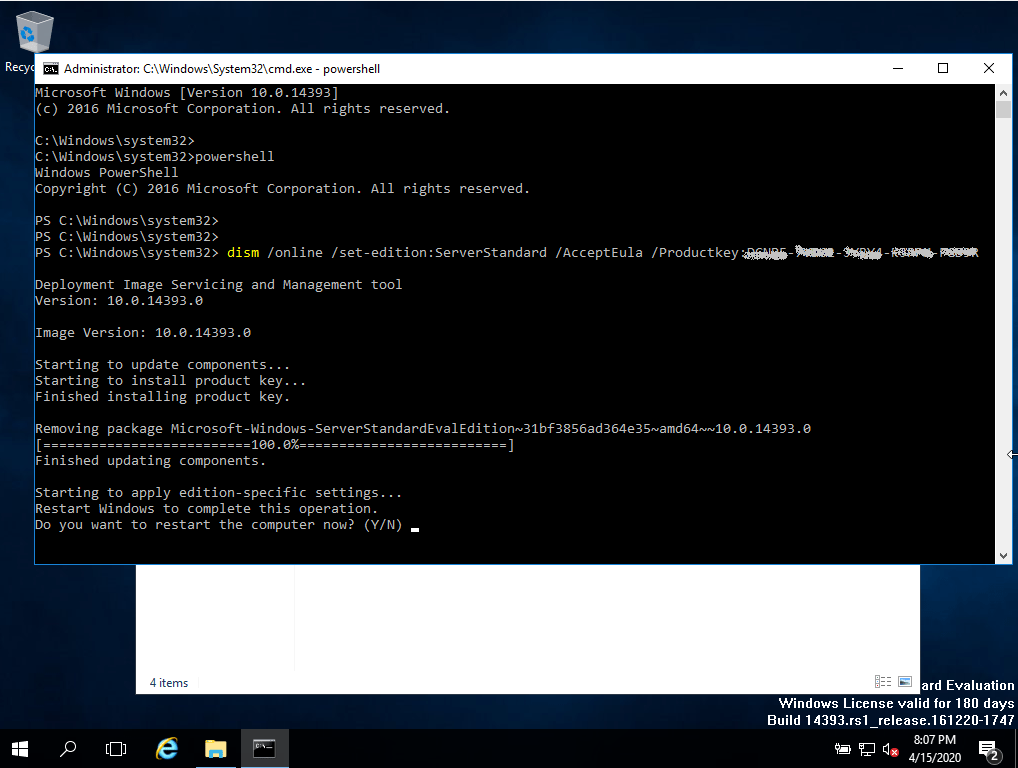
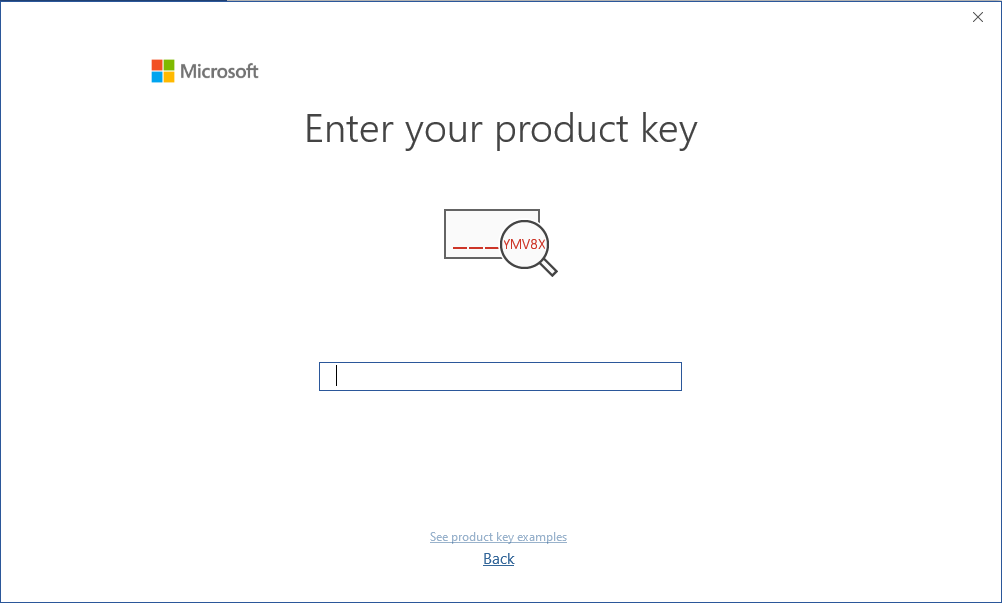
Complete the program installation and enter the “activation key” during or at the end of the process.

Once the download and the installation of the program is complete, enter the activation key when running any application from the Microsoft Office package, for example Microsoft Word. It usually will be the first thing that you will be asked for. Should that dialog not pop up you can enter the registration key in the “File” menu under “Account” (Office 2013/2016/2019) or under “Help” (Office 2010).

The mounted image should now appear on your Computer. If this does not appear (for example in Windows 7) you have to use an alternative program to mount the product image, such as WinCDEmu which can be downloaded for free from the following link:

WinCDEmu

Use this program to create a virtual disk so that you can install your purchased program.

Microsoft has gradually phased out support for some older products. Therefore, telephone activation is no longer possible. If you have any problems or questions during the Installation, please contact our 24/7 customer service.

2/3/4/5 PC

For activations on more devices, please follow the steps in this guide on each device that you want to activate the program.
We wish you a successful installation. If you still have problems or questions about the installation, please contact our customer service at any time. We will help you as soon as possible.

2019 RDS USER CAL

Installation guide Windows Server 2019 RDS USER CAL

  • 1 gigahertz (GHz) or faster or 64-bit (x64) processor
  • 2 gigabyte (GB) RAM
  • 60 GB of available hard disk space
  • DirectX 9 graphics device with WDDM 1.0 or higher driver

The acquired CALs are applicable to all editions of Windows Server 2019 (Essentials, Standard, Foundation, Datacenter) and compatible with previous versions of Windows Server.

LANGUAGE64 BITS
DEUTSCHHerunterladen
ENGLISHDownload
FRANÇAISTélécharger
ITALIANOScarica
ESPAÑOLDescarga

To activate an RDS CAL, first make sure that the following roles and features are installed and running on your server.

  1. Make sure the following feature is installed: Remote Desktop Services.
  2. 121/5000 Make sure you have the following features installed: Role Administration Tools -> Remote Desktop Services Tools:
    1. Remote Desktop Licensing Diagnoser Tool
    2. Remote Desktop Licensing Tools
  3. Make sure the following role services are enabled: Remote Desktop Services:
    1. Remote Desktop Licensing
    2. Remote Desktop Session Host
  4. Make sure your Server is specified as the Remote Desktop license server in your Group Policies.

After you have verified all the requirements described above:

Go to Server Manager

  1. Run the tools submenu
  2. Choose Terminal Services -> Remote Desktop License Manager
  3. Right click on your server and select “Activate server”
  1. Select your connection method, we recommend you choose “Automatic connection”.
  2. Fill in the required information of your company.
  3. At the end of the wizard, be sure to check the “Start license installation wizard now” option.
  4. In the License Program, select “License Package (Retail Purchase) and click Next.
  5. Apply the key.
  6. Your server should now have the activation status as “Activated”.

For a step-by-step guide to setting up your server, check out this video guide:

Watch video tutorial

We wish you a successful installation. If you still have problems or questions about the installation, please contact our customer service at any time. We will help you as soon as possible.

2019 RDS DEVICE CAL

Installation guide Windows Server 2019 RDS DEVICE CAL

  • 1 gigahertz (GHz) or faster or 64-bit (x64) processor
  • 2 gigabyte (GB) RAM
  • 60 GB of available hard disk space
  • DirectX 9 graphics device with WDDM 1.0 or higher driver

The acquired CALs are applicable to all editions of Windows Server 2019 (Essentials, Standard, Foundation, Datacenter) and compatible with previous versions of Windows Server.

LANGUAGE64 BITS
DEUTSCHHerunterladen
ENGLISHDownload
FRANÇAISTélécharger
ITALIANOScarica
ESPAÑOLDescarga

To activate an RDS CAL, first make sure that the following roles and features are installed and running on your server.

  1. Make sure the following feature is installed: Remote Desktop Services.
  2. 121/5000 Make sure you have the following features installed: Role Administration Tools -> Remote Desktop Services Tools:
    1. Remote Desktop Licensing Diagnoser Tool
    2. Remote Desktop Licensing Tools
  3. Make sure the following role services are enabled: Remote Desktop Services:
    1. Remote Desktop Licensing
    2. Remote Desktop Session Host
  4. Make sure your Server is specified as the Remote Desktop license server in your Group Policies.

After you have verified all the requirements described above:

Go to Server Manager

  1. Run the tools submenu
  2. Choose Terminal Services -> Remote Desktop License Manager
  3. Right click on your server and select “Activate server”
  1. Select your connection method, we recommend you choose “Automatic connection”.
  2. Fill in the required information of your company.
  3. At the end of the wizard, be sure to check the “Start license installation wizard now” option.
  4. In the License Program, select “License Package (Retail Purchase) and click Next.
  5. Apply the key.
  6. Your server should now have the activation status as “Activated”.

For a step-by-step guide to setting up your server, check out this video guide:

Watch video tutorial

We wish you a successful installation. If you still have problems or questions about the installation, please contact our customer service at any time. We will help you as soon as possible.

2019 Essentials

Installation guide Windows Server 2019 Essentials

  • 1 gigahertz (GHz) or faster or 64-bit (x64) processor
  • 2 gigabyte (GB) RAM
  • 60 GB of available hard disk space
  • DirectX 9 graphics device with WDDM 1.0 or higher driver

Verify that you have a stable Internet connection during installation. Please follow these steps for a successful activation

If you already have a (installed) version of Windows Server 2019 Essentials as a download or on USB / DVD, first try activating this version with our product key. Make sure your version of Windows matches the Windows version of the product key. Otherwise, or in case the installation doesn’t work, continue with point 2.

Download your version of Windows Server from the following link:

Windows Server 2019 Essentials

LANGUAGE64 BITS
DEUTSCHHerunterladen
ENGLISHDownload
FRANÇAISTélécharger
ITALIANOScarica
ESPAÑOLDescarga

The ISO file is the version for a permanent installation on a PC

After downloading, burn the ISO file to DVD or save it to USB. Once you boot your PC / Laptop with the DVD / Pendrive the installation program will run. Follow the guided steps of the program to complete its installation.

This supplied Microsoft installation includes a 180-day trial. To convert to a full version, run the command:

 cmd / Powershell

as administrator:

slmgr.vbs /ipk XXXXX-XXXXX-XXXXX-XXXXX-XXXXX

(Instead of the Xs, enter the product key)

We wish you a successful installation. If you still have problems or questions about the installation, please contact our customer service at any time. We will help you as soon as possible.

2019 Datacenter

Installation guide Windows Server 2019 Datacenter

  • 1 gigahertz (GHz) or faster or 64-bit (x64) processor
  • 2 gigabyte (GB) RAM
  • 60 GB of available hard disk space
  • DirectX 9 graphics device with WDDM 1.0 or higher driver

Verify that you have a stable Internet connection during installation. Please follow these steps for a successful activation

If you already have a (installed) version of Windows Server 2019 as a download or on USB / DVD, first try activating this version with our product key. Make sure your version of Windows matches the Windows version of the product key. Otherwise, or in case the installation doesn’t work, continue with point 2.

Download your version of Windows Server from the following link:

Windows Server 2019 Datacenter

LANGUAGE64 BITS
DEUTSCHHerunterladen
ENGLISHDownload
FRANÇAISTélécharger
ITALIANOScarica
ESPAÑOLDescarga

The ISO file is the version for a permanent installation on a PC

After downloading, burn the ISO file to DVD or save it to USB. Once you boot your PC / Laptop with the DVD / Pendrive the installation program will run. Follow the guided steps of the program to complete its installation.

This supplied Microsoft installation includes a 180-day trial. To convert to a full version, run the command:

 cmd

and then in the console, run the command

Powershell

as administrator run this other command:

Dism /Online /Set-Edition:ServerStandard /AcceptEula /ProductKey:XXXXX-XXXXX-XXXXX-XXXXX-XXXXX

(Instead of the Xs, enter the product key)

We wish you a successful installation. If you still have problems or questions about the installation, please contact our customer service at any time. We will help you as soon as possible.

2019 Standard

Installation guide Windows Server 2019 Standard

  • 1 gigahertz (GHz) or faster or 64-bit (x64) processor
  • 2 gigabyte (GB) RAM
  • 60 GB of available hard disk space
  • DirectX 9 graphics device with WDDM 1.0 or higher driver

Verify that you have a stable Internet connection during installation. Please follow these steps for a successful activation

If you already have a (installed) version of Windows Server 2019 Standard as a download or on USB / DVD, first try activating this version with our product key. Make sure your version of Windows matches the Windows version of the product key. Otherwise, or in case the installation doesn’t work, continue with point 2.

Download your version of Windows Server from the following link:

LANGUAGE64 BITS
DEUTSCHHerunterladen
ENGLISHDownload
FRANÇAISTélécharger
ITALIANOScarica
ESPAÑOLDescarga

The ISO file is the version for a permanent installation on a PC

After downloading, burn the ISO file to DVD or save it to USB. Once you boot your PC / Laptop with the DVD / Pendrive the installation program will run. Follow the guided steps of the program to complete its installation.

This supplied Microsoft installation includes a 180-day trial. To convert to a full version, run the command:

cmd

and then in the console, run the command

Powershell

as administrator run this other command:

Dism /Online /Set-Edition:ServerStandard /AcceptEula /ProductKey:XXXXX-XXXXX-XXXXX-XXXXX-XXXXX

(Instead of the Xs, enter the product key)

We wish you a successful installation. If you still have problems or questions about the installation, please contact our customer service at any time. We will help you as soon as possible.

2016 RDS USER CAL

Installation guide Windows Server 2016 RDS USER CAL

  • 1 gigahertz (GHz) or faster or 64-bit (x64) processor
  • 2 gigabyte (GB) RAM
  • 60 GB of available hard disk space
  • DirectX 9 graphics device with WDDM 1.0 or higher driver

The acquired CALs are applicable to all editions of Windows Server 2016 (Essentials, Standard, Foundation, Datacenter) and compatible with previous versions of Windows Server.


LANGUAGE64 BITS
DEUTSCHHerunterladen
ENGLISHDownload
FRANÇAISTélécharger
ITALIANOScarica
ESPAÑOLDescarga

To activate an RDS CAL, first make sure that the following roles and features are installed and running on your server.

  1. Make sure the following feature is installed: Remote Desktop Services.
  2. 121/5000 Make sure you have the following features installed: Role Administration Tools -> Remote Desktop Services Tools:
    1. Remote Desktop Licensing Diagnoser Tool
    2. Remote Desktop Licensing Tools
  3. Make sure the following role services are enabled: Remote Desktop Services:
    1. Remote Desktop Licensing
    2. Remote Desktop Session Host
  4. Make sure your Server is specified as the Remote Desktop license server in your Group Policies.

After you have verified all the requirements described above:

  1. Go to Server Manager
  2. Run the tools submenu
  3. Choose Terminal Services -> Remote Desktop License Manager
  4. Right click on your server and select “Activate server”
  1. Select your connection method, we recommend you choose “Automatic connection”.
  2. Fill in the required information of your company.
  3. At the end of the wizard, be sure to check the “Start license installation wizard now” option.
  4. In the License Program, select “License Package (Retail Purchase) and click Next.
  5. Apply the key.
  6. Your server should now have the activation status as “Activated”.

For a step-by-step guide to setting up your server, check out this video guide:

Watch video tutorial

We wish you a successful installation. If you still have problems or questions about the installation, please contact our customer service at any time. We will help you as soon as possible.

2016 RDS DEVICE CAL

Installation guide Windows Server 2016 RDS DEVICE CAL

  • 1 gigahertz (GHz) or faster or 64-bit (x64) processor
  • 2 gigabyte (GB) RAM
  • 60 GB of available hard disk space
  • DirectX 9 graphics device with WDDM 1.0 or higher driver

The acquired CALs are applicable to all editions of Windows Server 2016 (Essentials, Standard, Foundation, Datacenter) and compatible with previous versions of Windows Server.

LANGUAGE64 BITS
DEUTSCHHerunterladen
ENGLISHDownload
FRANÇAISTélécharger
ITALIANOScarica
ESPAÑOLDescarga

To activate an RDS CAL, first make sure that the following roles and features are installed and running on your server.

  1. Make sure the following feature is installed: Remote Desktop Services.
  2. 121/5000 Make sure you have the following features installed: Role Administration Tools -> Remote Desktop Services Tools:
    1. Remote Desktop Licensing Diagnoser Tool
    2. Remote Desktop Licensing Tools
  3. Make sure the following role services are enabled: Remote Desktop Services:
    1. Remote Desktop Licensing
    2. Remote Desktop Session Host
  4. Make sure your Server is specified as the Remote Desktop license server in your Group Policies.

After you have verified all the requirements described above:

  1. Go to Server Manager
  2. Run the tools submenu
  3. Choose Terminal Services -> Remote Desktop License Manager
  4. Right click on your server and select “Activate server”
  1. Select your connection method, we recommend you choose “Automatic connection”.
  2. Fill in the required information of your company.
  3. At the end of the wizard, be sure to check the “Start license installation wizard now” option.
  4. In the License Program, select “License Package (Retail Purchase) and click Next.
  5. Apply the key.
  6. Your server should now have the activation status as “Activated”.

For a step-by-step guide to setting up your server, check out this video guide:

Watch video tutorial

We wish you a successful installation. If you still have problems or questions about the installation, please contact our customer service at any time. We will help you as soon as possible.

2016 Essentials

Installation guide Windows Server 2016 Essentials

  • Procesador de 1,4 gigahertz (GHz) o más rápido de 64 bits (x64) con NX/DEP
  • 2 gigabyte (GB) RAM
  • 60 GB of available hard disk space
  • Dispositivo gráfico DirectX 9 con resolución de 1024×768 Pixeles

Verify that you have a stable Internet connection during installation. Please follow these steps for a successful activation

If you already have a (installed) version of Windows Server 2016 Essentials as a download or on USB / DVD, first try activating this version with our product key. Make sure your version of Windows matches the Windows version of the product key. Otherwise, or in case the installation doesn’t work, continue with point 2.

Download your version of Windows Server from the following link:

Windows Server 2016 Essentials

LANGUAGE64 BITS
DEUTSCHHerunterladen
ENGLISHDownload
FRANÇAISTélécharger
ITALIANOScarica
ESPAÑOLDescarga

The ISO file is the version for a permanent installation on a PC.

After downloading, burn the ISO file to DVD or save it to USB. Once you boot your PC / Laptop with the DVD / Pendrive the installation program will run. Follow the guided steps of the program to complete its installation.

This supplied Microsoft installation includes a 180-day trial. To convert to a full version, run the command:

cmd / Powershell

as administrator:

slmgr.vbs /ipk XXXXX-XXXXX-XXXXX-XXXXX-XXXXX

(Instead of the Xs, enter the product key)

We wish you a successful installation. If you still have problems or questions about the installation, please contact our customer service at any time. We will help you as soon as possible.

2016 Datacenter

Installation guide Windows Server 2016 Datacenter

  • 1,4 GHz 64-bit CPU or faster with NX/DEP
  • 2 gigabyte (GB) RAM
  • 60 GB of available hard disk space
  • Graphic device with resolution of 1024 × 768 Pixels

Verify that you have a stable Internet connection during installation. Please follow these steps for a successful activation

If you already have a (installed) version of Windows Server 2016 as a download or on USB / DVD, first try activating this version with our product key. Make sure your version of Windows matches the Windows version of the product key. Otherwise, or in case the installation doesn’t work, continue with point 2.

Download your version of Windows Server from the following link:

Windows Server 2016 Datacenter

 
LANGUAGE64 BITS
DEUTSCHHerunterladen
ENGLISHDownload
FRANÇAISTélécharger
ITALIANOScarica
ESPAÑOLDescarga

The ISO file is the version for a permanent installation on a PC

After downloading, burn the ISO file to DVD or save it to USB. Once you boot your PC / Laptop with the DVD / Pendrive the installation program will run. Follow the guided steps of the program to complete its installation.

This supplied Microsoft installation includes a 180-day trial. To convert to a full version, run the command:

cmd

and then in the console, run the command

Powershell

as administrator run this other command:

Dism /Online /Set-Edition:ServerDatacenter /AcceptEula /ProductKey:XXXXX-XXXXX-XXXXX-XXXXX-XXXXX

(Instead of the Xs, enter the product key)

We wish you a successful installation. If you still have problems or questions about the installation, please contact our customer service at any time. We will help you as soon as possible.